Note: Please know that it will not look exactly like the original, it will not be perfect and do not expect your bracelet to come out perfect. If you guys have other ideas on how to re-string the Mumbai, please let me know. I'm looking for ways to make it perfect :)
- Your Mumbai of course
- Rope from your Jewelmint velvet bags
- Pliers
- Wire cutters
How to remove the rope from your Jewelmint velvet bags:
- untie the knots on both ends of the bag
- there should be two separate strands of rope, pull both of them out. You will only need one of them.
-Before you start, you need to know the pattern. The pattern is... plate and then 2 beads.
Step 1
Fold the string in half.Step 2
String the first plate with one string on the bottom and one on the top.Step 3
Continue to do this until you are finished. If the Mumbai is too big, remove one or two plates. (I have around 5 inch wrists and had to remove one one plate)Tie a double knot at the end of the bracelet.
Step 5
Remove the original clasps from the original Jewelmint bracelet with your pliers.Step 6
Place on end of the clasps on one end of the bracelet and the other clasp on the other end. (ATTACH THEM TO THE CHORDS)Step 7
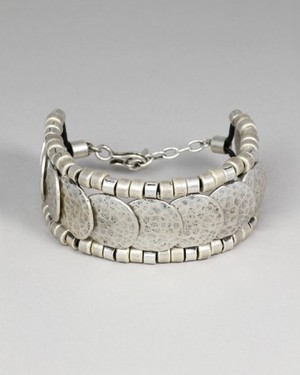
Voila! You have successfully revived your Mumbai bracelet.
No comments:
Post a Comment